Expert Tips For Professional-Looking E-commerce Product Photos
In the fast-racing world of e-commerce, outstanding product images can determine the success or failure of a sale. Consumers depend significantly on visuals during their buying choices, and clear, high-quality photos promote trust and improve transformations. Whether you own a small business, run a dropshipping venture, offer ecommerce product photography services, or are an aspiring photographer. Being skilled in product photo editing is essential to differentiate yourself in the competitive online market.
In this guide, we will walk you through the essential steps for editing product images to achieve a polished and professional appearance. You'll learn practical methods to improve your product images and increase your store's credibility. These include background removal, color correction, sharpening details, and optimizing for web display. Whether you use Photoshop, Lightroom, or complementary online tools, these suggestions will assist you in producing impressive visuals that attract customers and increase sales.

1. Choose the Right Editing Software
Before beginning the editing process, choose a software that suits your requirements. Several well-known options are available, with each providing separate factors to adapt to varying levels of skill and project needs.
Adobe Photoshop
- It is one of the best tools for editing professional product images. It allows you to adjust every aspect of your images.
- Its wide range of tools is perfect for tasks such as retouching, masking, and composing complex compositions.
Adobe Lightroom
- Lightroom is an excellent tool for adjusting exposure, color balance, and contrast, particularly for vast groups of photos.
- It is easy to use and assists you in keeping uniformity among various images.
Canva
- Canva is an easy-to-use tool for beginners that simplifies and streamlines basic editing tasks such as resizing, cropping, and inserting text.
- It is a perfect tool for individuals who want to produce professional-quality visuals quickly without a complex learning process.
GIMP
- GIMP is a free and free available source alternative to Photoshop that provides a vast collection of editing features.
- It's excellent for anyone seeking advanced capacities at no extra cost, although mastering it might take some time.
2. Adjust Brightness and Contrast
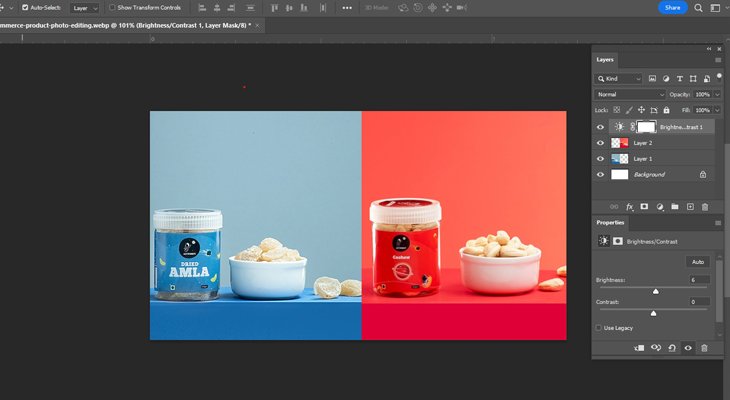
Proper lighting effectively highlights your product. Use these suggestions to make your product appear its best and attract customers.
Increase brightness
- Brightening the image of your product makes it more visible and highlights its features.
- This is particularly important for products with complex features that must be visible to potential buyers.
Adjust The Contrast
- It is more critical to increase contrast, which helps to expose the product's features.
- The product needs to distinguish between light and shadow regions, which can improve the image's depth and create a more dynamic appearance.
Avoid Overexposing Or Underexposing
- Overexposure could eliminate details, and underexposure may cause the product to appear too dark.
- Aim for balanced exposure that accurately reflects the product while maintaining essential details.
3. Correct White Balance
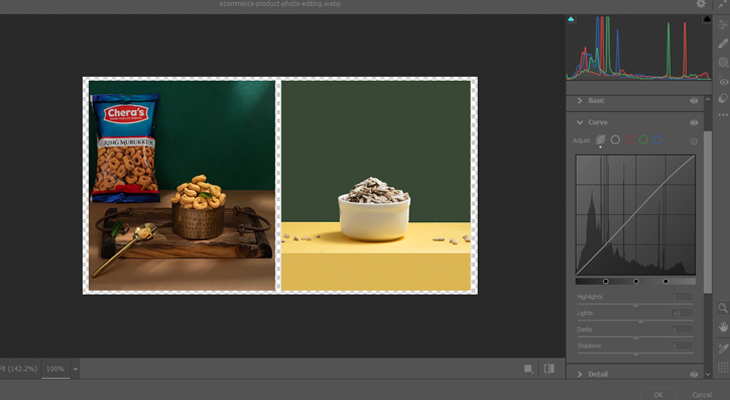
White balance ensures that colors seem accurate and natural, improving the professionalism and reliability of your product photos.
Automatic White Balance Adjustment
- Many editing tools provide an automatic white balance option that quickly modifies the colors for a more natural appearance.
- This serves as a simple initial guide if you're unsure about how to adjust the white balance manually.
Manual Adjustment
- This achieves more accurate color correction; adjusting the white balance manually lets you refine the image until the colors appear just right.
- This is particularly beneficial for Products that have different color specifications.
A Neutral Gray Backdrop
- Using a neutral gray backdrop helps in avoiding any unwanted color shades from changing the product's look.
- It offers a reliable foundation that guarantees your product's colors stay accurate.
4. Remove Backgrounds for a Clean Look
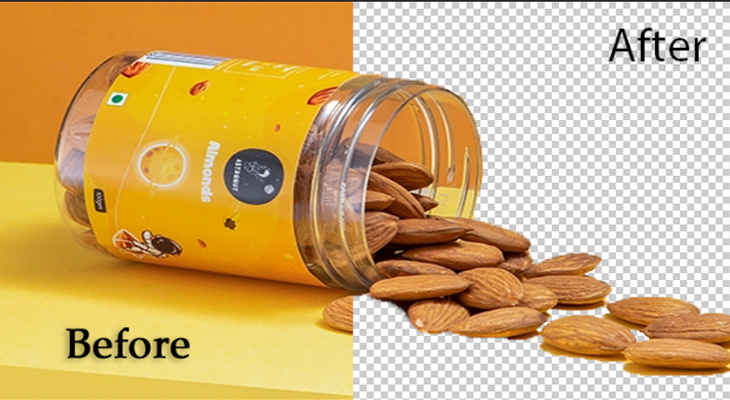
A plain background keeps attention on your product and eliminates any unwanted distractions. It produces a neat, professional appearance that highlights the product's features and overall attractiveness.
Photoshop Remove Background Tool
- This practical tool precisely separates your product from its background.
- This function is most effective for e-commerce product photography, which has precise edges and ensures a neat, professional appearance.
Remove.bg (free online tool)
- Remove.bg is an easy, quick, and free resource that instantly removes backgrounds in a moment.
- It is perfect for fast adjustments when you lack access to advanced software.
Clipping Paths and Masks
- This helps with complex edges, such as hair, fur, or transparent products. Clipping paths and layer masks offer better control.
- These methods allow you to improve edges for a more graceful and natural outcome manually.
5. Improve Colors and Sharpness
Increased color and sharpness help to show the product naturally and see the details with a professional look.
Slightly Increase Saturation
- Increasing saturation can make colors look more colorful and more attractive while maintaining their natural look.
- Avoid over-saturating because it may cause the product to appear unrealistic or misleading.
Use clarity and sharpness Tool
- Adjusting clarity and sharpness improves the edges and details of your product, giving it a more defined appearance.
- This highlights minor details, making the image look sharp and professional.
Minimize Noise and Grain
- Eliminating noise and graininess gives your product images a polished, high-quality look.
- This is especially beneficial for photos captured in dim lighting or with high ISO settings.

6. Adjust and Improve for Online Use
Resize Images To A Proper Resolution
- Oversized images can delay website loading times, so resizing them to approximately 1000x1000 pixels provides a middle between quality and performance.
- This resolution ensures clarity in details while preserving a swift user experience.
Using tools such as TinyPNG or JPEG Optimizer for file compression
- This process decreases file size while maintaining product image quality.
- Use tools such as TinyPNG or JPEG Optimizer to help ensure that your website loads quickly while still showing clear images.
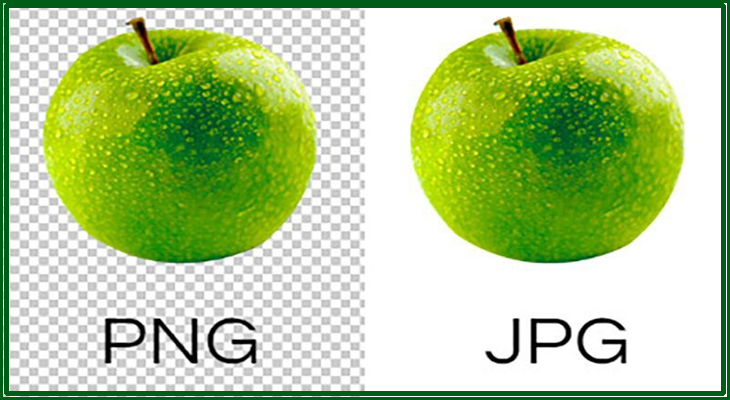
Make sure the format is either JPEG or PNG to be web-friendly
- JPEG is excellent for reducing file sizes, while PNG works best for transparent backgrounds.
- Selecting the correct format ensures your images appear accurately on every gadget and platform.
7. Maintain Consistency
Consistency in product images promotes brand trust and establishes a professional, unified appearance. It helps consumers identify your brand and feel confident in their buying choices.
Uniform Lighting and Backgrounds
- Using similar lighting arrangements and backgrounds for every product image results in a unified and professional appearance.
- This uniformity allows customers to compare products effortlessly and promotes a strong brand identity.
Similar Angles and Positions
- Maintaining uniformity in product angles and positioning provides a smooth browsing experience.
- It also gives your product listings a neat, organized, and attractive appearance.
A Uniform Color Grading or Filter
- Using similar color modifications or filters on every image guarantees a uniform visual appearance.
- This helps in strengthening brand awareness and guarantees that products appear consistent across different images.

Expert Product Photography Services For E-commerce Success
Editing product images for e-commerce is essential for establishing a clean, professional, and attractive online store. Selecting proper editing software to fine-tune brightness and contrast, fix white balance, eliminate distractions, and provide consistency enables you to improve the quality of your images and build customer trust. Professionally edited images not only highlight your products but also increase user experience and extend sales.
Don't forget to optimize images for online performance, guaranteeing quick load speeds while maintaining quality. Using these editing methods, you can produce excellent product images that attract consumers and improve your brand's trustworthiness. Though various software tools can be used, photography by a professional photographer for e-commerce is always the best. Pavithra Photography offers the best e-commerce and commercial product photography service in Coimbatore. We also provide lifestyle photography, packshot photography, and brand photography. Start improving your product images and make your online store reach greater heights with our service.


